Domain Setup
Domain Purchasing
What is a Domain Name?
A domain name is the address of your website that internet users type in the browser URL bar to visit your website.
How to Purchase a Domain Name
Step 1: Visit this link
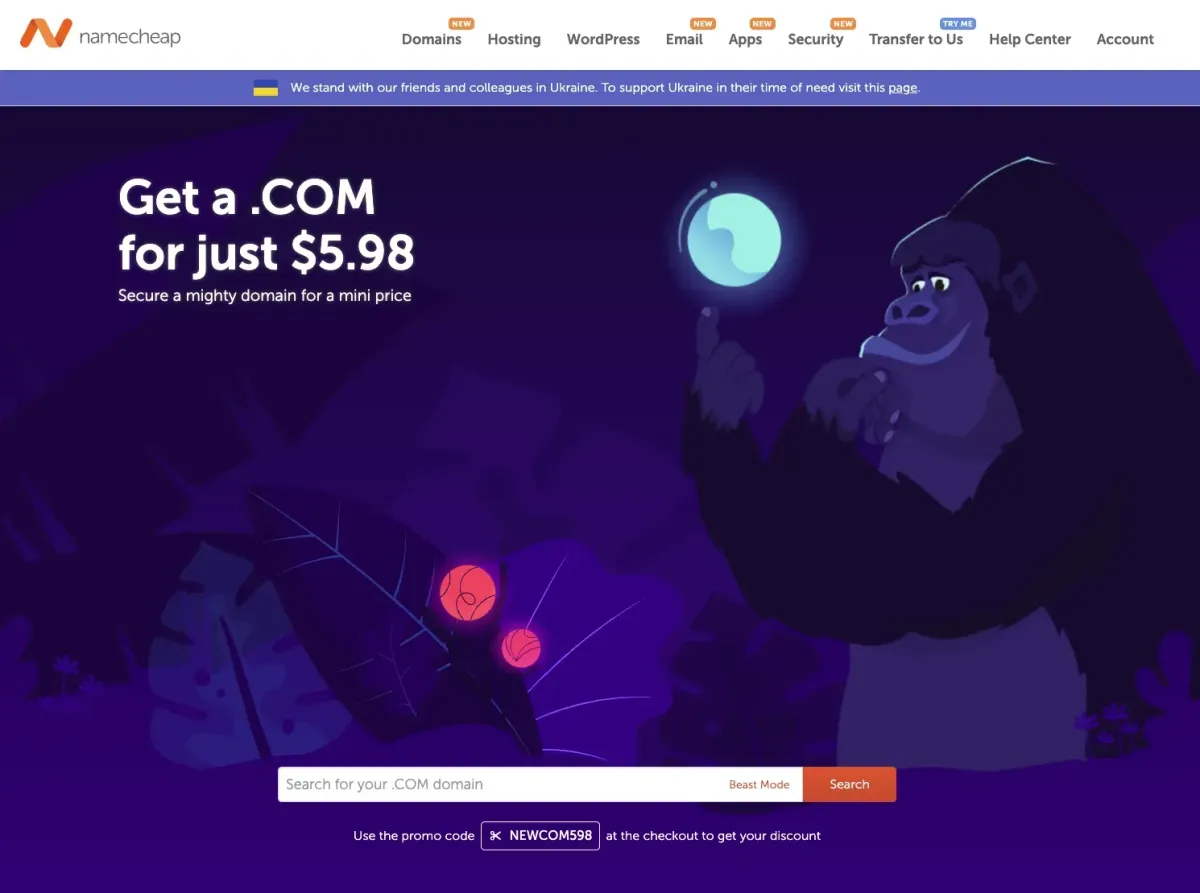
Step 2: Click on the ‘Domains’ tab and click on the second option where you can ‘Get a .COM for just $5.98’
See screenshot below:
Step 3: Type your own domain ‘yourdomain.com’ and make sure to copy the promo code ‘NEWCOM598’ ← to be used at checkout. See the screenshot below:
Step 4: Click ‘Add to cart’
Step 5: Then click the orange ‘Checkout’ button at the bottom of the page
Step 6: At the checkout page, make sure you only pay ‘1 Year’, recommended to have Auto-Renew and Domain Privacy on. Ignore other add-ons.
Step 7: Enter the promo code ‘NEWCOM598’ and click ‘Confirm Order’ to complete the purchase.
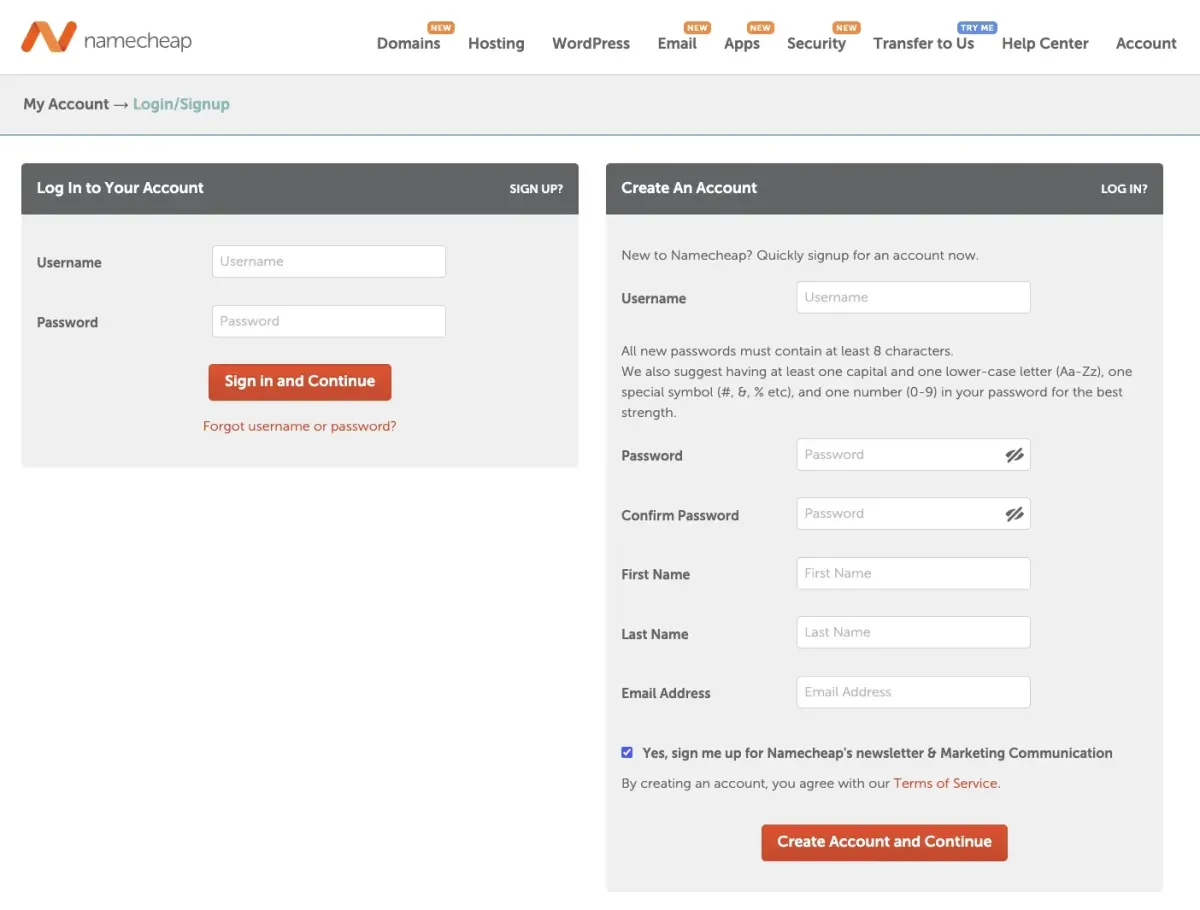
Step 8: Create an account
Step 9: Once the account is created, enter your billing details and complete the purchase.
Step 10 (VERY IMPORTANT step): Once you have successfully purchased the domain, remember to Verify the domain ← you will receive a separate email to do so
Step 11: After every step above is done, allow us access to manage your domain as a developer/manager. Visit this link for further instructions.
Domain Transfer
Here’s a step-by-step guide to help you through Domain transfer to Namecheap (as recommended):
Step 1: Prepare Your Domain for Transfer
1) Check Domain Eligibility:Ensure your domain is at least 60 days old (ICANN rule).Make sure the domain is not expired or locked.
2) Unlock Your Domain:Log in to your current registrar’s account.Find the domain you want to transfer and unlock it. Look for a setting like "Domain Lock" or "Transfer Lock" and disable it.
3) Get the Authorization Code (EPP Code):Request the authorization code (also called an EPP code or transfer key) from your current registrar.This code is required to initiate the transfer to Namecheap.
4) Verify Contact Information:Ensure your domain’s WHOIS contact information (especially the admin email) is up to date. You’ll receive important transfer emails at this address.
Step 2: Start the Transfer Process at Namecheap
1) Create a Namecheap Account:
If you don’t already have one, sign up for a Namecheap account at www.namecheap.com
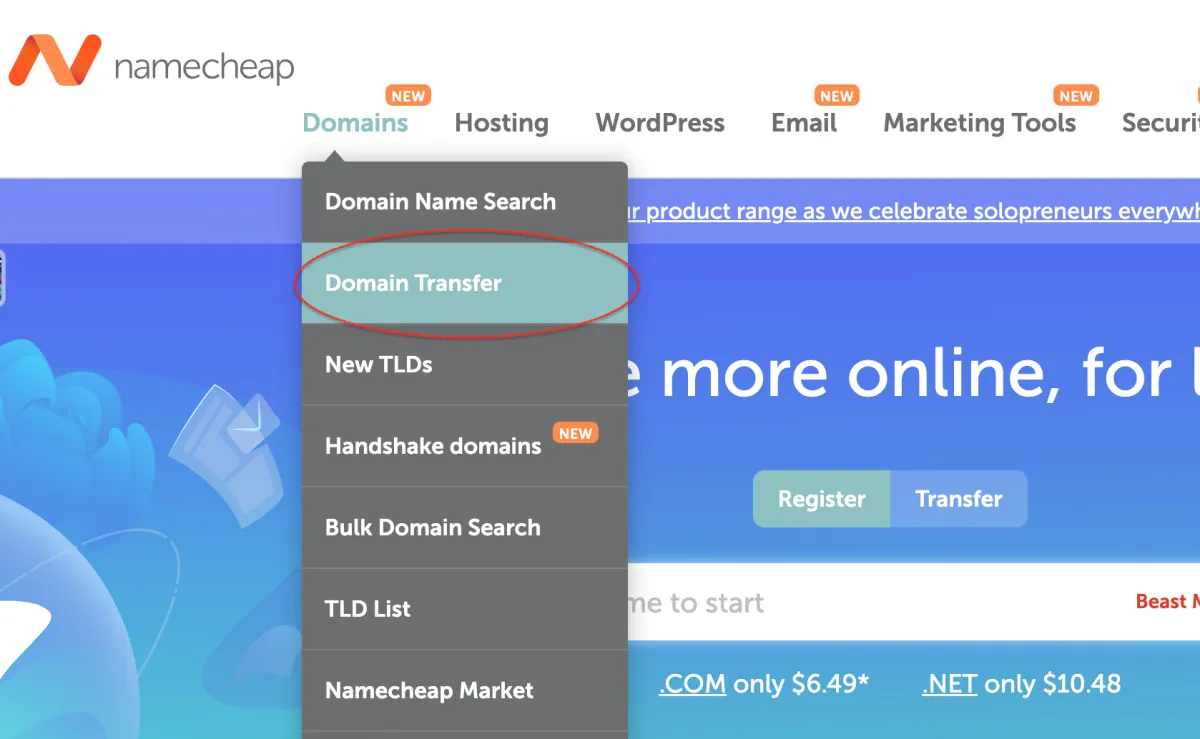
2) Initiate the Transfer:
Log in to your Namecheap account. Go to Domain Transfer (see screenshot above). Enter the domain name you want to transfer and clickTransfer.
3) Enter the Authorization Code:
When prompted, enter the EPP code you received from your current registrar.
4) Complete the Order:
Follow the prompts to complete the transfer order. You’ll need to pay for the transfer, which also renews your domain for an additional year.
Step 3: Approve the Transfer
Check Your Email:After initiating the transfer, you’ll receive an email from your current registrar asking you to approve the
transfer.Click the approval link in the email to confirm the transfer.Wait for the Transfer to Complete:The transfer process can take 5-7 days to complete.Namecheap will notify you once the transfer is successful.
Step 4: Verify and Manage Your Domain
1) Log in to Namecheap:
Once the transfer is complete, log in to your Namecheap account.Your domain will now appear in your dashboard.
2) Update DNS Settings (if needed):
If you had custom DNS settings at your old registrar, update them in Namecheap to ensure your website and email continue to work.
Tips for a Smooth Transfer
Double-check the EPP code and ensure your domain is unlocked.
Keep your domain active with your current registrar until the transfer is complete
If you encounter issues, contact Namecheap’s support team for assistance.
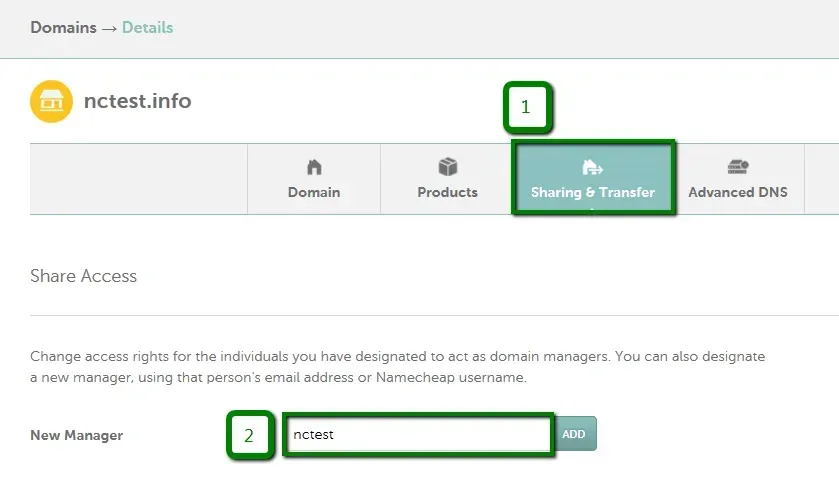
Sharing Domain Access with Naz
In order to share access with Naz, do the following:
1. Sign into your Namecheap account (The Sign In option is available in the header of the page).
2. Select Domain List from the left sidebar and click on the Manage option in front of the domain name you would like to share access for:

3. Choose the Sharing & Transfer tab from the top menu and find the Share Access section. Simply input [email protected] or 'nazreenmdaud' into the New Manager field and click Add:
That's it!
We will receive manager access verification and accept it. Thank you.